
Your Graduation Cap Is Your Moment to Shine
Graduation day is one of the most significant milestones in any student’s life — and your cap is your personal billboard in the sea of gowns. Great graduation cap decoration tells your story, celebrates your achievement, and often becomes the most photographed detail of the entire ceremony. Whether you are crafty or a complete beginner, this step-by-step guide will help you create a cap design you will be proud to wear and even prouder to remember.
Graduation Cap Measurements for Decorating
Graduation cap measurements for decorating are the practical starting point. Before buying any materials, measure your cap:
- Standard graduation cap top panel: 9 x 9 inches (most common size)
- Some caps measure 8.5 x 8.5 inches — always measure yours before cutting any materials
- The board is typically made of cardboard or hardboard, which can be decorated directly
- If your school requires an undamaged cap, decorate on removable foam board cut to size
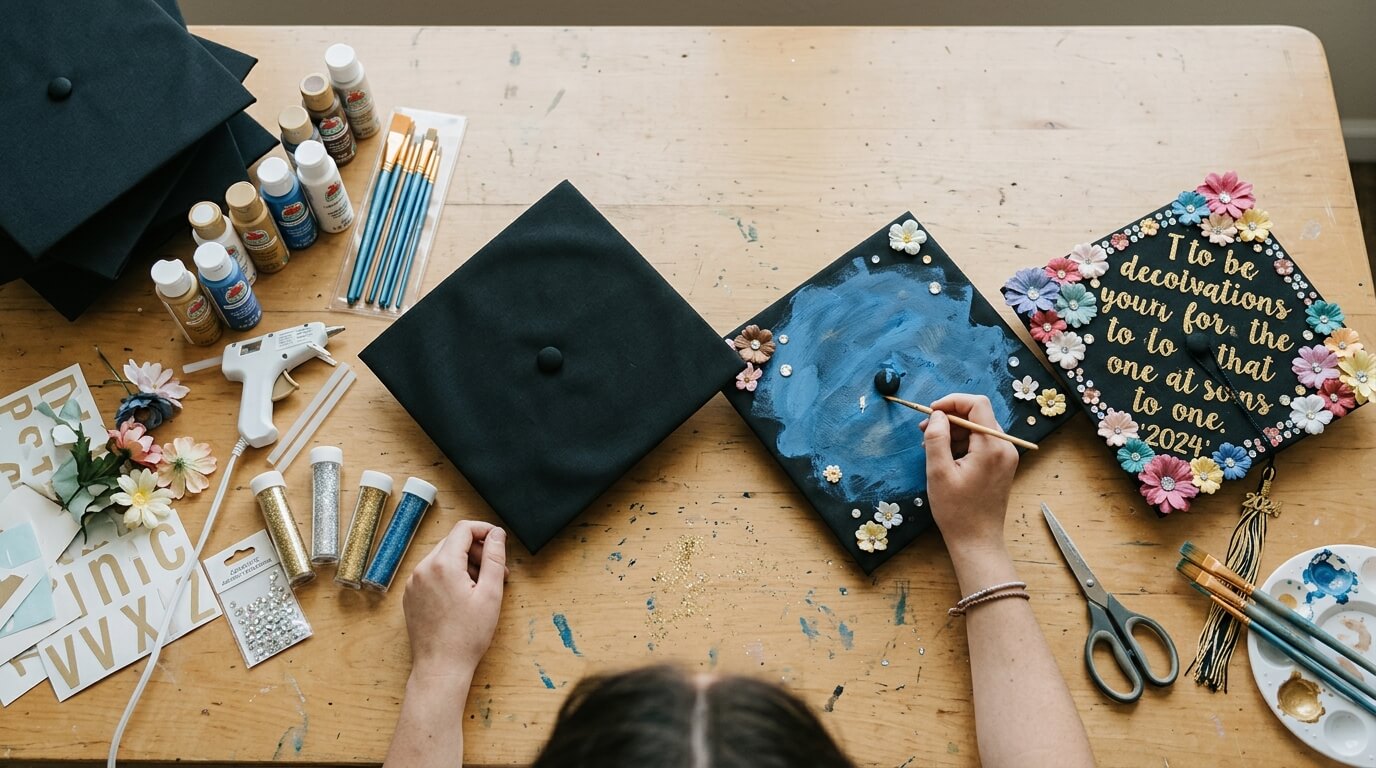
How to Decorate a Graduation Cap — Step-by-Step
Step 1: Choose Your Theme or Quote
This is the most important decision. Your decoration should reflect who you are and what this moment means. Popular approaches include:
- A meaningful quote — from a favorite book, song, or mentor
- A future career theme — stethoscope for medicine, scales for law, palette for art
- A pop culture reference — a beloved movie, show, or character that defined your years
- A personal milestone — honoring a struggle overcome, a person who inspired you
Step 2: Sketch Your Layout
On paper, sketch your design at the same size as your cap (usually 9 x 9 inches). Divide the space intentionally — a central element, supporting decorations around it, and any text. Keep text large enough to read in photos — at minimum half an inch tall.
Step 3: Gather Your Materials
- Cardstock or scrapbook paper for backgrounds
- Adhesive rhinestones, gems, or glitter for sparkle
- Markers, paint pens, or printed lettering for text
- Silk flowers, ribbon, or fabric accents for dimension
- Strong craft glue or hot glue gun
- A foam board cut to cap size if you want a removable surface
Step 4: Create the Background
Cut your background paper or fabric to fit the cap. Cover the entire top panel for a clean, finished look. Popular backgrounds include solid colors, glitter cardstock, chalkboard paper, galaxy print, and floral fabric.
Step 5: Add Your Central Design
This is the star of your cap. If you are using printed text, print it, cut it out, and glue it in place. If you are painting or drawing freehand, use a light pencil sketch first, then go over with permanent marker or paint pens.
Step 6: Decorate and Embellish
Now add the details that make your cap unique. Rhinestones around borders, small flowers in corners, gold leaf accents, miniature diploma scrolls, or tiny figurines related to your field. Less is often more — focus on quality over quantity.
Step 7: Seal and Protect
Lightly spray the finished cap with a clear acrylic sealer. This protects your work from sweat, humidity, and handling. Let it dry completely before your graduation ceremony.
Popular Graduation Cap Decoration Themes
| Theme | Design Elements | Best Quote Style |
| Classic Scholar | Tassel, diploma, laurel wreath | Latin motto or inspiring quote |
| Career-Ready | Field-specific symbols and tools | Job title or career goal |
| Pop Culture | Movie/show reference, character | Famous film quote |
| Sentimental | Family photo, meaningful symbol | Personal tribute message |
| Humorous | Meme, pun, or funny reference | Comedy quote or wordplay |
Graduation Party Decoration Ideas
After the ceremony, celebrate in style. For a party with an inspirational feel, the theme from a beloved children’s book about new adventures works beautifully — balloons in the school colors, a banner with the graduate’s name and year, and a dessert table with a decorated cake.
Balloon decoration ideas for graduation are among the most impactful and affordable party choices:
- Balloon columns at the entrance — in school colors for a festive welcome
- A balloon arch as a photo backdrop — the single most photographed party element
- Balloon bouquets as table centerpieces — anchor them with a weight and fan out in a cluster
- Giant number balloons spelling out the graduation year
Other Special Occasion Decoration Ideas
Hotel room decoration for birthday celebrations shares many of the same elements — balloons, banners, and personalized touches. Coordinate with the hotel in advance. Bring your own battery-powered fairy lights, a custom banner, and a small balloon arrangement. Many hotels will assist with setup for an additional fee.
Decorating a gazebo for a wedding ceremony similarly benefits from layering — start with fabric draping, add greenery garlands, then flowers, then accent lighting. A low budget rustic wedding decor DIY approach using wildflowers, mason jars, and burlap ribbon creates a charming, intimate atmosphere that often photographs better than formal arrangements.
KEY TAKEAWAYS:
- Measure your graduation cap before buying materials — most are 9 x 9 inches but sizes vary
- Choose a theme that is personal and meaningful — the best caps tell a story
- Seal your finished cap with acrylic spray to protect it during the ceremony
- Balloon arches and columns are the most impactful — and surprisingly affordable — graduation party decor
Frequently Asked Questions
Q: How long does it take to decorate a graduation cap?
Simple designs with pre-made elements can be completed in 1 to 2 hours. Elaborate, handcrafted designs with rhinestones, layered elements, and custom painting may take 4 to 6 hours. Start at least a week before graduation day.
Q: Can I use a hot glue gun on my graduation cap?
Yes — hot glue is one of the most reliable adhesives for graduation caps. It bonds to most materials quickly and holds well. Use a low-heat glue gun to avoid warping thin cardstock or fabric.
Q: Will my school allow a decorated graduation cap?
Policies vary widely by institution. Many schools allow decorated caps. Some require that the tassel remain visible and that decorations stay within the cap boundaries. Check your school’s specific graduation guidelines beforehand.
Q: What is the best way to transport a decorated graduation cap without damaging it?
Place it in a shallow box with a piece of tissue paper underneath. Do not stack anything on top. Carry it flat rather than tilted to prevent rhinestones or flowers from shifting.