
Graduation day is one of the most significant milestones of your life. Your decorated cap is your personal statement in a sea of identical mortarboards. This guide covers everything you need to know about how to decorate graduation cap beautifully — from measurements to materials to final touches.
Can I Decorate My Graduation Cap?
Can i decorate my graduation cap? The answer depends on your school’s policy. Most universities and high schools allow cap decoration, but a growing number have restrictions on height, size, or content. Always check your school’s commencement guidelines before investing time in your design. Key policy points to verify:
- Height restriction — most schools limit decorations to 1–2 inches above the cap surface
- Offensive content — text and imagery must be school-appropriate
- Attachments — some schools prohibit 3D structures that obstruct views during photo taking
When in doubt, keep your design flat, tasteful, and under 1 inch in height.
Graduation Cap Measurements for Decorating
Graduation cap measurements for decorating vary slightly by manufacturer and size, but here are standard dimensions:
- Cap board (mortar board) surface: approximately 9″ × 9″ (23 cm × 23 cm)
- Usable decorating area: approximately 8″ × 8″ after accounting for edges
- Tassel attachment point: center of the board on one side
Tip: Before cutting or designing, trace your cap’s exact dimensions onto a sheet of poster board for a practice run.
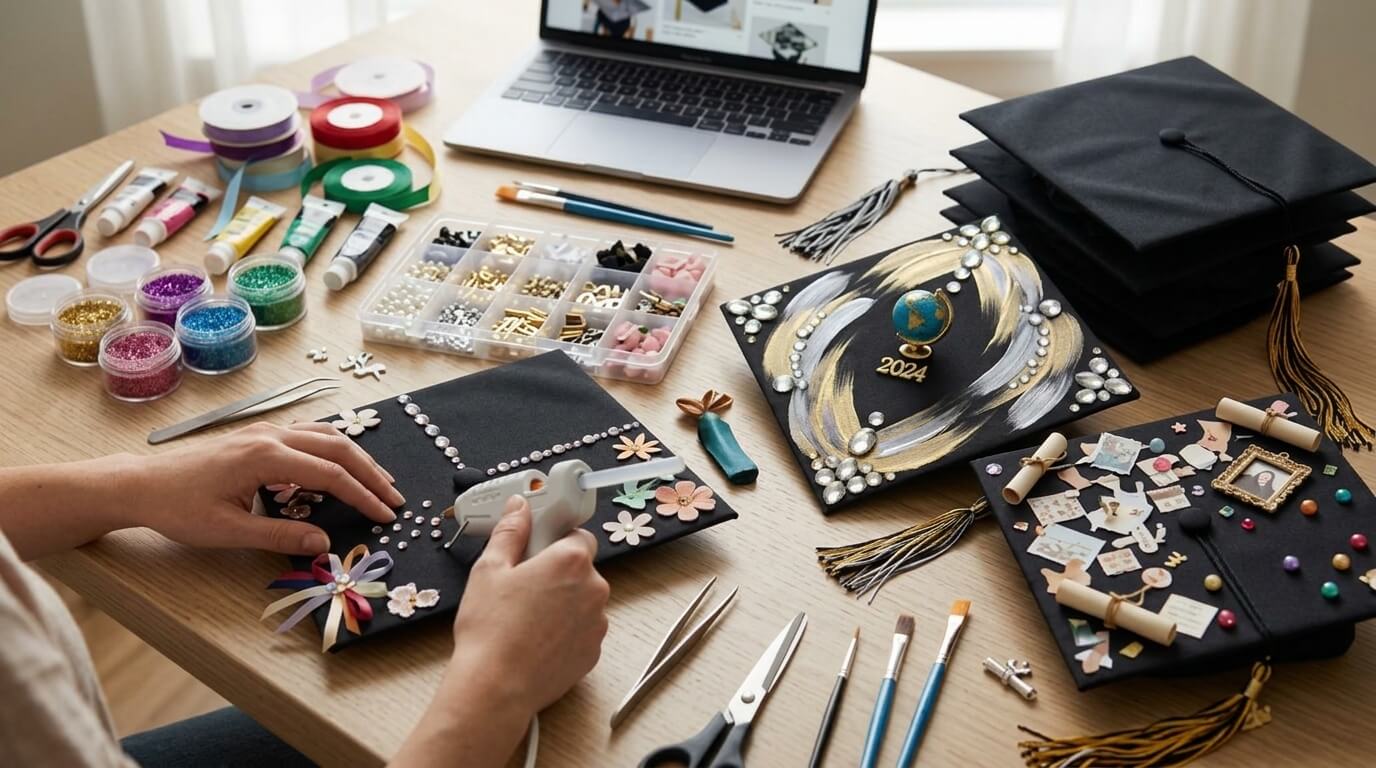
Best Materials for Graduation Cap Decoration
Here are the most popular materials for how to graduation cap decoration:
- Fabric — Hot glue fabric directly onto the cap surface. Works beautifully with lace, velvet, and patterned materials. Very flat and secure.
- Scrapbook paper — Inexpensive, available in thousands of patterns and colors. Cut to size and attach with strong adhesive.
- Acrylic paint — Paint directly on the cap surface using painter’s tape for clean edges. Seal with Mod Podge when dry.
- Rhinestones and glitter — Add sparkle with rhinestone stickers or loose glitter glued with Mod Podge
- Vinyl decals — Cut vinyl on a Cricut or Silhouette machine for crisp, professional-looking lettering and designs
- Dried flowers — Real or artificial dried flowers create a delicate, photogenic look
Step-by-Step: How to Decorate Your Graduation Cap
- Gather supplies — Cap, design template, materials, hot glue gun, scissors, ruler, pencil
- Create your design — Sketch it on paper first or use a design app. Consider how it will photograph from above.
- Measure and cut — Cut your base material (fabric or paper) to fit the cap surface exactly. Test fit before gluing.
- Attach the base layer — Use hot glue around all four edges and the center. Press firmly and let cool completely.
- Add your design elements — Start with the largest elements (letters, main images) and work toward smaller details
- Seal if needed — Apply a thin coat of Mod Podge over paper or paint to protect against moisture
- Let everything dry — Give at least 12 hours before wearing. Check that all elements are secure.
- Attach the tassel — Make sure the tassel attachment loop is accessible and not covered by your decoration
Cute Ways to Decorate Your Graduation Cap
Here are some of the most popular cute ways to decorate your graduation cap:
- Disney-inspired — “To infinity and beyond” or “Adventure is out there” with Disney character accents
- Future career — Medical students use a stethoscope design; law students use “Esquire” or scales of justice
- Pop culture references — TV show quotes, movie references, or song lyrics that have personal meaning
- Family tribute — Photos of family members printed and arranged as a collage
- Floral arrangement — Dried or silk flowers in your school colors arranged beautifully
- Minimalist — A simple gold monogram on a black cap can be more striking than a busy design
- Map or globe — “Not all those who wander are lost” on a world map background for the adventurous graduate
Ideas for Decorating Your Graduation Cap on a Budget
Ideas for decorating your graduation cap without spending a lot:
- Dollar Store: Craft supplies, ribbon, foam letters, stickers, and small decorations
- Print-at-home: Design and print your cap topper using free design tools like Canva
- Thrift store fabric: Buy a small piece of patterned fabric for $1–2 instead of a fabric store price
- Recycled materials: Repurpose old greeting cards, book pages, or maps
Balloon Decoration Ideas for Graduation
Beyond the cap, balloon decoration ideas for graduation parties make the celebration as memorable as the ceremony:
- Balloon arches — Use school colors for an Instagram-worthy entrance
- Number balloons — Giant foil “2026” or graduation year balloons
- Balloon bouquets — Mixed latex and foil balloons tied to chair backs
- Balloon columns — Frame the buffet table or gift table with vertical balloon towers
Key Takeaways
- Always verify your school’s policy before decorating
- Graduation cap measurements are approximately 9″ × 9″ — trace first, then cut
- Vinyl decals, fabric, and paint are the most popular decoration methods
- Start your design at least one week before graduation so everything is completely dry
FAQs
What do you use to decorate a graduation cap?
Hot glue, strong craft adhesive, fabric, scrapbook paper, vinyl decals, rhinestones, paint, and dried flowers are all popular choices. Avoid 3D decorations over 1–2 inches tall if your school has height restrictions.
How early should I decorate my graduation cap?
At least 48–72 hours before the ceremony. Glue and paint need full drying time, and you want the chance to fix anything that goes wrong.
Can I decorate my cap with dried flowers?
Yes. Dried flowers are one of the most beautiful options for how to decorate your graduation cap. Attach with hot glue and handle gently, as dried flowers are fragile.